
We’ve needed new kitchen chairs for a while now. The ones we had were like 70’s chairs, and not so pretty. But they did get the job done for sitting, and worked great for our first years of marriage! It was time for change so I ventured off to the D.I. (local second hand store in my area) in search of 4 CLEAN, nice looking chairs. I did indeed find 4 chairs in pretty great condition, so I picked them up for $15 a chair. My whole intent on buying them is so I could redo them into something pretty, really really pretty!
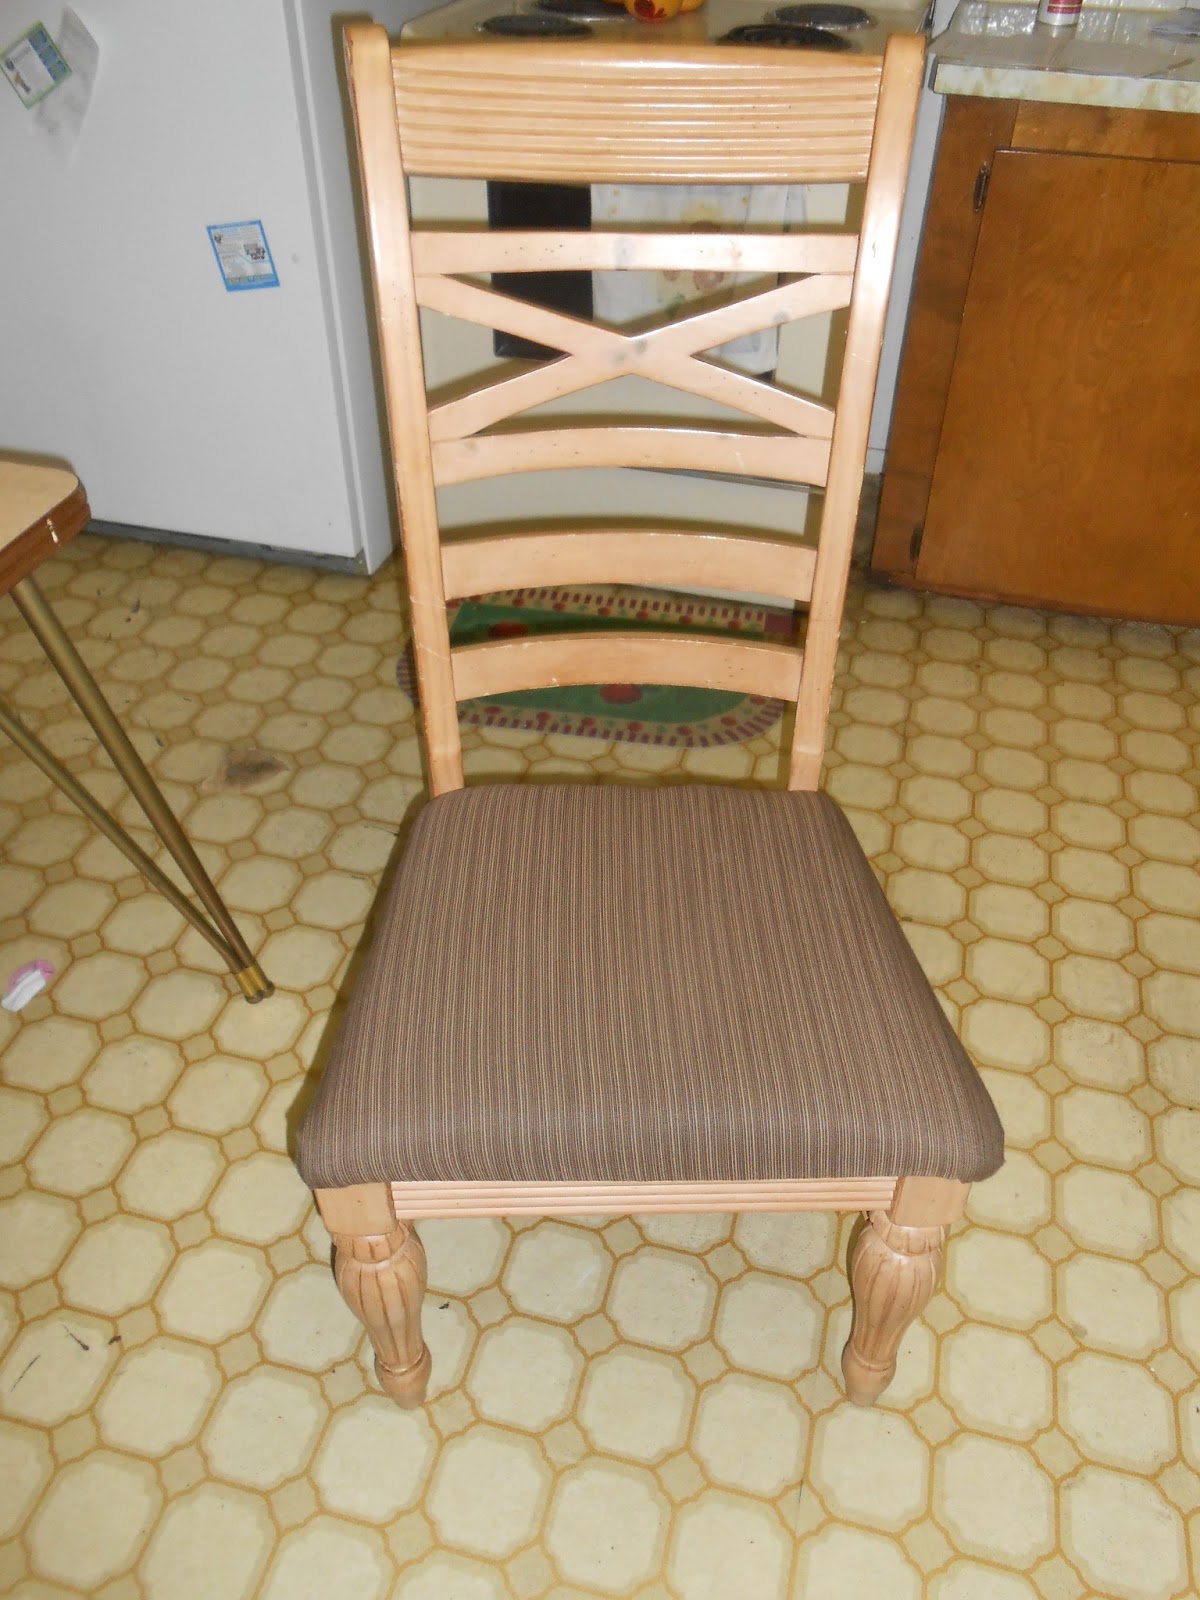
Not too bad, right? But they definitely needed some beautifying!
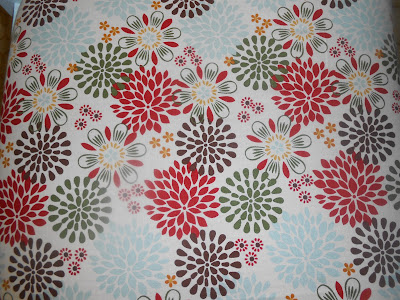
The next day I went out to search for fabric to redo and found the one calling my name saying, Kenzie, Kenzie, buy me, buy me! I bought it and every time I see it I smile, see for yourself! Pretty, isn’t it?!

After I got my fabric it was time to get paint and other supplies to get the job done. I chose a pretty blue that matched perfectly with the flowers on my fabric. All in all my chairs are beautiful, and super easy. It is time consuming, but well worth it once you get the finished project! Here is the tutorial how I did it!
CHAIR REDO TUTORIAL! (PAINT AND RE-UPHOLSTERED)
Supplies:
Fabric (3 yards worked for me, but you may want to measure yours)
Paint that matches fabric, preferably! (I got a quart of semi gloss, with left over to do touch-ups we missed)
Paint brushes
Sand paper (we got 180 grit)
Sanding block (if you have lots of detail like mine)
Staple gun and staples
Screwdriver
We did this whole project outside, it was a kick off to a wonderful spring that we’re hoping to have! 🙂
How to:
1. Removal:
You need to start off by taking the seat cushions out, with a screwdriver.
2. Sanding:
My husband and I used team work, so he sanded, because I had no idea how to do that, while I re-upholstered the chairs. Just him sanding took about an hour, this project will take all day with the drying and painting and other things. You could try an electric sander, but it may sand down too much of the chair. He sanded down leaving just a tiny bit of finish on some of the chairs. He just sanded more over the divots of the chair, if there were no divots, he’d briefly sand over the chair. Use your best judgment on this part.
3. Re-upholstering:
I used 3 yards of fabric for four chairs, with quite a bit left over. I didn’t even measure when I cut my fabric out. I laid my fabric with the print side down on the table. Then I got my seat cushion and put that on top of the fabric with the padded side down first. I cut about and extra 2-3 inches on each side so I could fold over the material onto the back of the seat cushion. Once its cut, cut out the other four using the one you just cut out.
Once all pieces of material are cut, get a piece of fabric you just cut out and put it print side down. Get a seat cushion and put the padded side down on top of the fabric.
4. Stapling:
Get the staple gun and fold the fabric over as far as it reaches and staple the top 3 times then the bottom 3 times. (By doing this it secures the fabric to the seat cushion just enough to hold it in place, but if you make a mistake and there is lots of material bunched up on the front of the seat cushion you just have to undo 3 staples instead of 15!) Then get the corners of the fabric and fold over and staple. Staple the rest of the fabric, checking every now and then on the other side to make sure none of the fabric is bunched up. Then go staple crazy and staple all the fabric of every side down securely (about 15-20 staples on each side.) Repeat this with other chairs. It should only take 5 minutes at the most to re-upholster one seat cushion.
5. Painting:
Once the sanding and seat cushions are done you can finally paint them that wonderful color you’ve been dreaming about for weeks! We did 2 coats of paint and it was sufficient enough. The paint we got recommended 2-3 hours before you put on the next coat, but we only waited an hour because it was sunny and windy out.

This is our finished project and we couldn’t of been more pleased of the outcome! Do this yourself and you’ll have people asking where you bought your cute chairs. You can proudly tell them you did it by yourself, they’ll be amazed and want to do the same thing! ENJOY!