Posted on

Oreo Cake Fudge Brownies

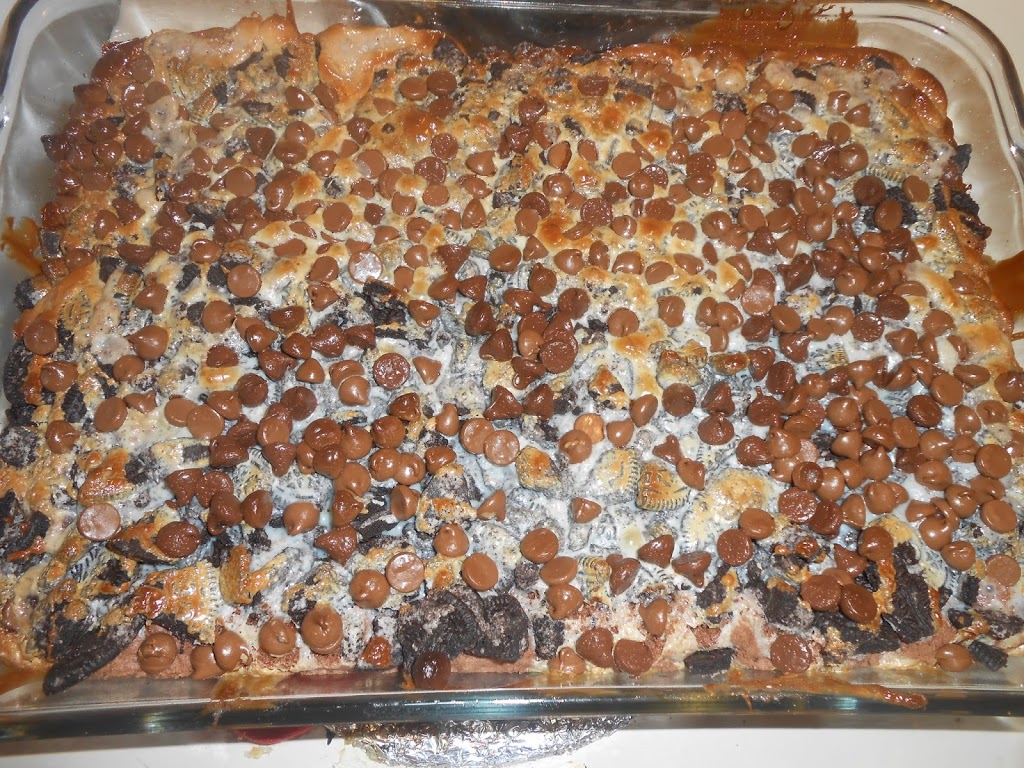
Is your mouth drooling yet from the title of this post yet. Well let me make it happen for you right about now….these yummy cake brownies start with a layer of chocolate brownie cake, then have 3/4 of a bag of oreos (or the whole bag if you are feeling dangerous!), you then put a whole can of sweetened condensed milk (to sweeten things up a bit more), finally you top it off with 1 1/2 cups of milk chocolate chips. Did your mouths water!? Mine did.

Oh, they’re so good. I want some now. 

These cake brownies are the easiest things on the planet. I wonder how on earth I ever survived my whole life without these. Credits go to pinterest and this blog for the wonderful recipe. I just explained above how to make them, but I will break it down to the basics, below.

The day I made them I had my nieces come over. They insisted that they needed one. I gave them each a brownie, and one of them said, “you could become famous for these.” Was this just a simple sweet statement from a child or was it true? See for yourself and let me know!

Be ready for awesomeness.

Mix your cake mix, butter, and egg and do this in a 9×13 pan.
Put your oreos on top, then your sweetened condensed milk.
Then add the chocolate chips. Feel free to put a little more on there. You only live once!
Bake your treats for 20-25 minutes.
Enjoy the treats that can make you famous, according to an 8 year old.
I do have to ask, now that you’ve made these do you think you can become famous over these? I think she was right. : ) 
Children are so wise

INGREDIENTS:
Chocolate cake mix
1 stick of butter melted (I use salted, but most people use unsalted.)
1 egg
1 1/2 cups chocolate chips
3/4 bag of oreos crushed  (or the whole bag if you’re feelin dangerous, as I said before.)
14 oz. can sweetened condensed milk

What to do:

  • Pre-heat oven to 350 degrees
  • Get a 9×13 pan and grease it with cooking spray
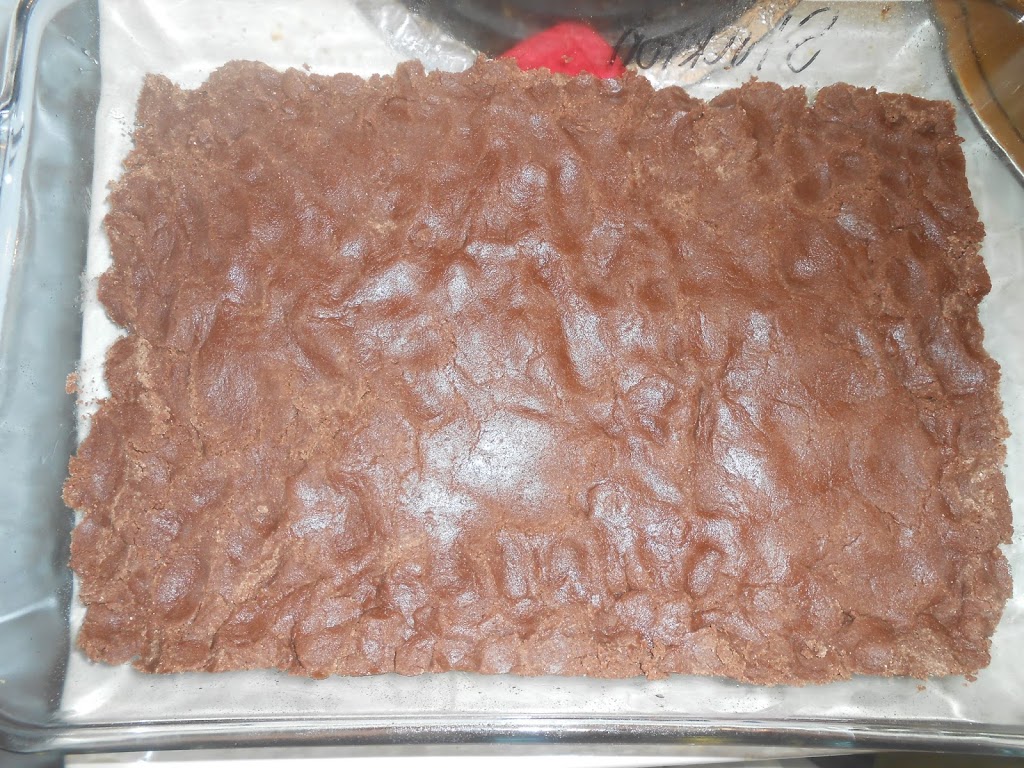
  • Mix your cake mix, butter, and egg in a large bowl, it will turn into a brownie like mixture. You may have to use your hands after a while it will be tough if you don’t.
  • Press the cake mix that looks like a brownie mixture into your 9×13 pan
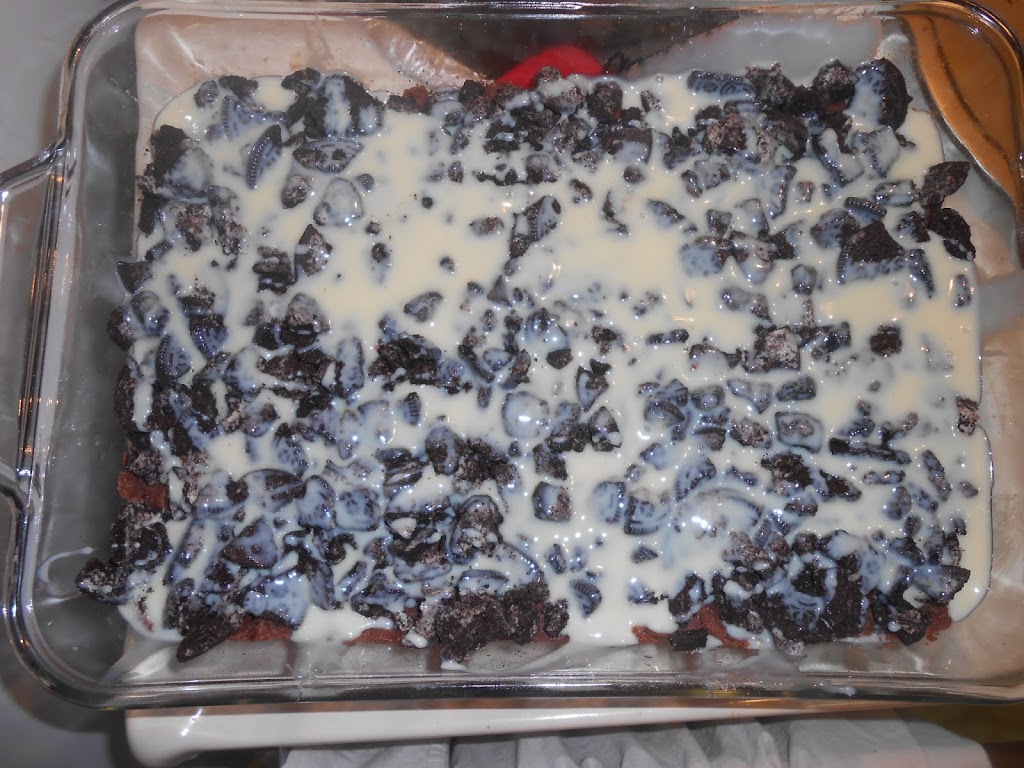
  • Place the crushed oreos on top
  • Pour your can of sweetened condensed milk all over the top of the oreos
  • Top with chocolate chips
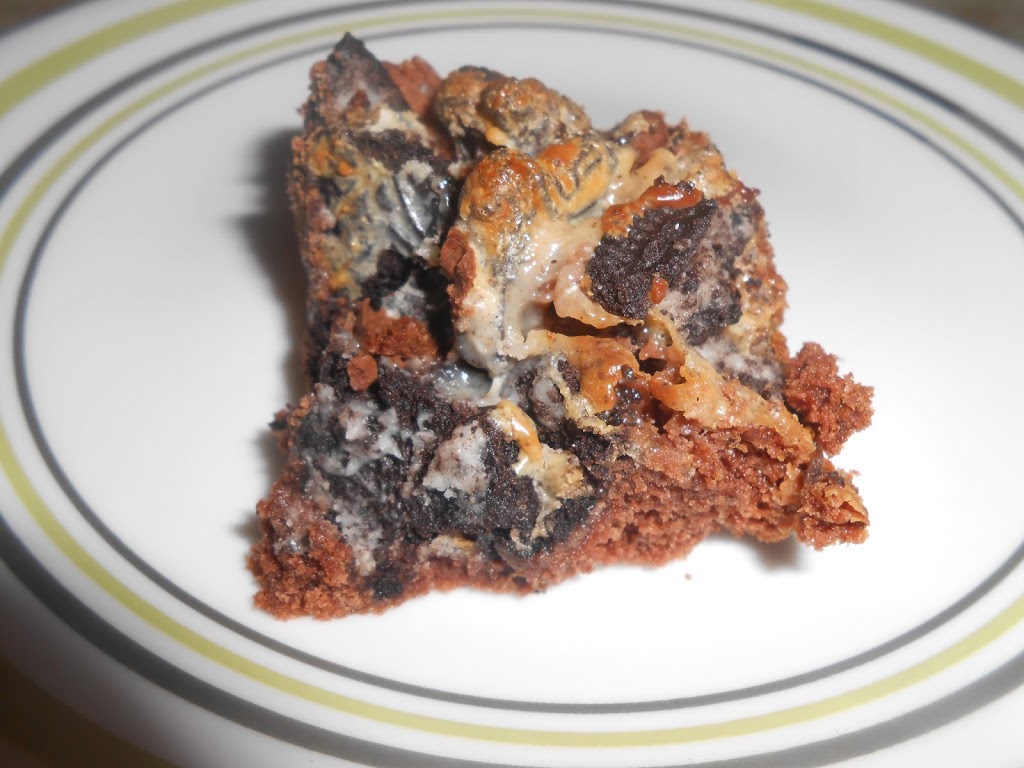
  • Bake in pre-heated oven for 20-25 minutes
  • Take out and let them cool for 10 minutes. (These brownies will be super gooey for about an hour. After that they aren’t as gooey and super delicious!
Please follow and like us:
Posted on

DIY picture tile.

This is my favorite craft to do. I have done 7 of these! It is soooo cheap and it only costs $1.78.  This is what I give as a wedding gift, because I am always on a budget! This is a gift that everyone will love, and you can tweak it in so many other ways as well! 🙂 You can pretty much put any thing on the tile and it will always be a cute decoration.

Supplies:
Modge podge
Sponge paint brush
Small tile- I got mine at Lowe’s for 78 cents
Scrapbook paper
Picture-I have done an actual photo that was printed at Costco, paper, and card stock. I think card stock has turned out the best for me. That way you don’t have to print a picture off at the store and you can just print at home from your computer and save money!
Instructions: 
  1. Take your tile and use it to cut out a piece of scrap book paper that fits on the tile, then modge podge the paper onto the tile. I put it on the back first, then I go over on the top to give it a glossy look. 
      2. 
Take your picture and cut it out. When I print it on my computer I tell it to print a 4×6 picture.                You’ll want to make the picture smaller then the tile. You can make it however small or big you want it, but I suggest you leave at least an inch of scrap book paper showing, because the scrap book paper is what makes this craft cute! Modge Podge the picture on and do another coat on top of the picture, to give it a glossy look. It will be white at first but when it dries, it is glossy! 
Make sure you don’t touch it when it’s drying. And make sure you get all the air bubbles out.
    3. If you want you can put letters on the picture. This was the first time I did this and I really liked it actually. It is cute either way! Now just wait for it to dry and you’re done! It takes less then 10 minutes and it such a cute gift!
Put it on a dollar store easel and it’s a beautiful homemade cherished gift! 🙂  
This is one I printed with paper, it didn’t work as well, because of the all the color. But I did do paper with a black and white photo and that one turned out a lot better. So if you use paper, I would suggest only a black and white photo, with not so much detail. If you use card stock and a colored picture it will turn out great.  
I hope this helps you out when your in a bind for a last minute wedding gift, or any gift for that matter! 
Please follow and like us:
Posted on

Tagxedo Word Art!

Have you ever heard of Tagxedo? Let me tell you, I discovered this the other day and I can’t get enough of it! It is just plain awesome. It puts words into an image for you. But it just looks awesome! Click right here to go to Tagxedo. I can’t explain to you how great it is, so let me just show you a picture!

Pretty sweet, right? Yes. 
When I saw this site, I instantly knew what I wanted to give my 8 year old Primary kids for their baptism gift. This is what my Presidency and I are going to give the kids on the Sunday after they are baptized. I think it is a perfect baptism gift! I am so glad I found this site. 
 At first the site seems like you can only have the 25 or so pictures they have to offer. That’s not the case!! Once you get to the site click on Images I believe and scroll to the bottom, you can download an image. So you can pick any image you want and write any words you want in it, and they have tons of color themes, and font themes to choose from. It is a genius website, and it’s FREE! 
For the gift, we just print this image with their name and all the other words in the above picture and change it to their favorite colors. We print it on card stock, and then we just buy an 8×10 frame at the dollar store. It is such a cute, simple, and heart warming, gift. It will help them remember to keep their covenants they made on their baptism day. I love it, don’t you. 🙂

Now, tagxedo is very, very hard to figure out at first. So I decided I would give you all some tips when using it at first.

1. GETTING YOUR DOWNLOADED IMAGE: 
When you start your image will automatically be of the Earth. The words all over it will be Mother, and Earth. To change this click on Shape, it will give you many different options to choose from. To get your own image, scroll to the bottom of the shapes and click on download image. (or something like that) It will then pop your image up you can change the blur and the other option it gives to the best way you like it. Click accept, and it will show you what your image looks like, if it looks bad go back and try to fix it. 
2. THE WORDS:
This took me forever to figure out how to change the words. I had a CTR shield and the words Mother and Earth all over it. After seriously 30 minutes of searching I found where to do it! 
  • Click on “Load”, it is above the Save option. Once you click load, it will have a box to put a url, and a text box. 
  • Use the text box to write whatever words you want. I only had about 5 words on my image, So I just wrote the ones I wanted to be the biggest 2 or 3 times. The more frequent the word, the bigger than the rest of them. 
I hope this saves you time by reading this step, because it was a bugger to find for me!
3. FONT AND COLOR:
This is pretty simple. After the word Font, Theme, etc., it will have a swirl after the words. Don’t click that. It will change everything you just worked on to something random. There will be an arrow after that. Click that, and you can change your font and color (which is the theme). 
Hope these help you out and save you a little bit more time then it did for me! 🙂 
Please follow and like us:
Posted on

Save money and use a garbage sack for your diaper genie!

Does anyone dread going to the store because you know you have to buy a diaper genie refill and spend a lot of money on something you just throw away? Well I do, and I have come up with a solution on how to not buy them anymore and save money! Plus, it’s soooo easy!!  YAY!! We get 3 loads out of our refills, and a single refill is $5. So, we were pretty much paying $1.75 to hold my babies diapers. If you use a garbage sack instead it will only cost about 10 cents per load of diapers. ( Don’t judge my math, these are all estimates, but you get my drift.) Yeah, I will take that over  $1.75 any day. Here is how!

All you need is:
Any garbage sack
Diaper genie refill that needs to be refilled. Haha. I thought that was funny! If you didn’t get it, it’s just an empty diaper genie refill.

Start out by putting your empty refill upside down. Put your garbage sack in the little slot where the previous one use to be. Do this all the way around it. You’ll have to bunch it a bit because the sack isn’t meant for this, but it works! When you’re all done it should look like number 3 of my pictures.

Keep pushing it through, you’re almost done! 
Done. Finally. Put your hand in the bag and pull out. Your refill should still be upside down.
Keep pulling through….
Done. Now even out your garbage sack and….
VOILA! You’re done! Told you it was easy. 
Save money, live better. That’s my motto. Wait maybe that’s Walmart’s….well it’s mine too! 🙂 I truly hope this makes you, and your babies life easier. 
Please follow and like us:
Posted on

Cinnabon Cream French Toast

This post sounds risky, but let me tell you, it’s not! I personally have never liked french toast, ever. Since yesterday was conference I decided to make a big breakfast and give french toast one last chance, if it wasn’t good this time  it would be on my bad foods list forever. I knew I had to make it so I would fancy it. But what to do….?

I decided put this in, instead of milk. It succeeded and it took french toast off the chopping block. If it is made this way at least.
Are you ready to hear the best part of this recipe? It doesn’t even need syrup! I did use syrup on some because I ran out of my sugary mixture that I put on the french toast. But if you have the sugar mixture you won’t need very much syrup or none at all! I like to bake my french toast instead of putting it on a griddle. I think it tastes better baked. 🙂
So would you like to know how to make it? Okay I will give you my secret recipe. I am pretty proud of myself because I thought of this on my own. I did get an idea from one recipe but mixed some ingredients up in it. I hope your ready to get sugared out. It’s worth it, trust me! 😀
Cinnabon Cream French Toast
Serves 5 
Invented by: Mackenzie Stockton (ME)
Ingredients:
Texas toast bread
1 cup cinnabon coffee creamer 
4 eggs
1/4 cup brown sugar
1/2 cup butter + 1 tbs
1 tbs honey
Instruction:
  • Preheat oven to 375 degrees.
  • Melt your 1/2 cup butter in a medium skillet. Add your brown sugar and honey. Once it starts bubbling, take off burner and pour onto a plate. Take your bread and coat both sides in the brown sugar mixture. 
  • Mix your eggs  and creamer in a cake pan. (That’s all you need because of the sweetness of the cream! Isn’t that awesome!?)
  • Melt your 1 tbs of butter in a skillet and let the bread brown just a bit on both sides. (The reason I poured the brown sugar mixture onto a plate is because if you brown your bread in the brown sugar mixture on the skillet it will use all the sugar mixture on just one piece of bread.)
  • Once your bread is browned, dip it in your egg and cream mixture then put on a cookie sheet.
  • Bake for 20 minutes at 375 degrees.
Enjoy your yummy french toast. You will enjoy it, I promise! As I said before I don’t even like french toast and I loved this! 🙂
Now I’m sure someone has made something like this, but I didn’t look it up and I thought of it on my own so therefore I invented it. 🙂
Please follow and like us:
Posted on

DIY curtains out of bed sheets! No sew!

DIY Curtains!
(only $12.00 or less)
I made my own pleat! Oh yeah!

I’ve been needing curtains in my room forever! We don’t have blinds so we’ve had a blanket over our window. It makes our room soooo dark and creepy, I hated it. Finally, yesterday I got the courage to attempt to make my own curtains because they’re too expensive to buy! I took off that blanket and couldn’t believe my eyes, my room was lit with natural light, it was a wonderful site. 🙂

One of my favorite parts of my project was watching my daughter laugh at me! I was trying to put up a queen sheet of my own to see if that was a good size sheet to buy and use as curtains, and she laughed at how hard I struggled to put that sheet up.

What a little cheese ball!

 Isn’t she the cutest thing ever!?                                        
Supplies:
  • Queen size sheet or fabric. You’ll have to measure your window to see what you need. My window was 76 in. wide.
  • Heat n Bond (ultra hold works the best!) This stuff is amazing!! It’s for us no-sewers. 🙂 I got mine at Walmart in the sewing section.
  • Ribbon
  • Hot glue and glue gun
  • Scissors 
  • Tape measure
  • Iron

How to:

Step 1:
-Start out by measuring your window, as I said earlier. That way you can see what size sheet you need. I happened to need a queen size sheet.
Step 2: 
-Measure your sheet and cut it in half up and down, it doesn’t have to be perfect, but don’t make an awful cut! 🙂 
-Once it’s cut length wise cut both your curtain halves at the bottom. You’ll need to measure how long you want your curtains to be. If you want them to touch the floor then measure from the curtain rod to the floor. I wanted mine just a little bit shorter and not touching the floor. 
This is just one of my halves. Make sure you do both! 
Step 3: 
-After your curtains are cut, get your amazing Heat n Bond. Now, I have heard of it before, but I never knew it was so magical! This stuff is awesome if you can’t sew! I want to do many sewing projects and use this stuff instead, it’s really awesome! 🙂 
-Take one curtain half and flip it so the pretty side is down. 
-Take heat n bond and put the sticky/scratchy side down, smooth side up on your upside down fabric.
-Iron the heat n bond onto fabric. (Wait for it to cool about 10-15 seconds! It will burn you if you touch it right after you iron it. I know from experience, unfortunately!)
-Once it’s cooled,  take off the white paper on top.

-Fold over fabric and iron again. This will make it stick and you’ll have a straight edge instead of a scratchy cut one.
It’s not ironed here. I just didn’t take a picture of it ironed. 
-Do these steps to every edge you cut to make it a straight edge. Do it with the other curtain. Once your done it should look like this. 
Step 4:
-Take your ribbon and cut out 14, 2 inch strips. (7 for each curtain) The ribbon is going to hold your curtain up. So you can cut as many that satisfies you and your curtain. 
-Hot glue the ribbon to the back of the curtain. I glued the top, then the bottom. Make sure you can put at least 2 fingers in between your ribbon. Just to make sure you have enough space to put it through the rod.
-Once it’s glued you can cut off the extra ribbon so you don’t have alot of excess ribbon.  Once it’s done it should look like this. 
I would have put the ribbon and the very ends instead of where I put it in this picture. When I hung my curtain it kind of flopped down because nothing was really supporting the ends. But it’s not noticeable, unless you made the curtain. No one will know the difference. 🙂 
-Glue the rest of the ribbon on and your finished and ready to hang them up! 
They make a good pleat! 

I couldn’t get a great picture because I don’t have blinds. 
I love my DIY cheap bed sheet curtains! It was so worth it and I am glad I don’t sleep in a dungeon
anymore. 🙂 I woke up this morning to the light. It was wonderful site! Have a great day! 😀 
Please follow and like us:
Posted on

Avocado Egg Salad Sandwich’s

My last post I showed you how to hard-bake eggs, not boil. And as I promised, here is how to make my favorite sandwich after making hard boiled (baked this time around) eggs. Now before I start I want to tell you that I don’t like egg salad, but adding the avocado really changes thing up, and make it eatable! This recipe is great if you love pickely/vinegary things. Even if you don’t love that flavor as much I really suggest you try it. You won’t regret this yummy sandwich!


Ingredients: (makes about 3-4 sandwich’s depending on how much you stuff your bread)
1 avocado- I love the avocado so I add more because it’s the best! 
3 hard boiled eggs – click here to see how I baked mine! (Don’t you love the colored eggs too? 🙂 )
1 tsp dijon mustard
1 tbs apple cider vinegar (1 1/2 tbs for me)
1/4 tsp dill weed (I put a bit more in)
1/4 tsp garlic powder
1/4 tsp salt
Dash of parsley flakes
How to:
  • Get your 3 eggs and cut them up into small pieces.
  • Take your avocado and mash it up with a fork
  • Combine all of your ingredients with the egg.
I shouldn’t of used a green bowl! 
You’re done! Super easy sandwich, super delicious, and super healthy! 🙂 I hope you enjoy this as much as I do! 

Please follow and like us: